# Install the Salesforce B2C LINK Cartridge
You can install the Salesforce B2C LINK Cartridge in two easy steps:
* [Step 1: Set up the Business Manager](#importing-cartridges)
* [Step 2: Import metadata](#step-2-import-metadata)
## Step 1: Set up the Business Manager
### Importing cartridges
{% hint style="info" %}
**Note**: The following steps detail how to deploy the [cartridges ](https://docs.digitalriver.com/salesforce-b2c-link-cartridge/salesforce-b2c-link-cartridge-3.0.1/introduction/general-workflow#install-the-connector-cartridges)using Salesforce UX Studio for Eclipse or Visual Studio. Alternatively, you can use Visual Studio Code with the Prophet Debugger extension or the command line interface.
{% endhint %}
1. Establish a new digital server connection with your SFCC Instance.
2. Import cartridges to a workspace in Salesforce UX Studio. \

3. Add the cartridges to the Project Reference of Server Connection.\

4. Wait until Studio completes the workspace build and uploads source codes to the sandbox.
### Assigning cartridges to the site
1. Sign in to the Salesforce Commerce Cloud.
2. Select **Administration**, select **Sites**, and then **Manage Sites.**
3. On the **Manage Sites** page, click the **Business Manager** link in the **Business Manager** section of the page.\

4. At the beginning of the cartridge path, add the following: `bm_digitalriver:` and`:int_digitalriver`. Click **Apply**.\

5. Return to the top level **Administration** page.
6. Select **Sites**, and then click **Manage Sites**. Select your site from the list named **Storefront Sites**. \

7. Click the **Settings** tab. At the beginning of the **Cartridges** field, add the following: `int_digitalriver_customercredit:int_digitalriver_sfra:int_digitalriver:int_digitalriver_webhooks:`.
8. Click **Apply**. This updates the path in the **Effective Cartridge Path** field. The complete path will now have the new entries at the beginning.\

## Step 2: Import metadata
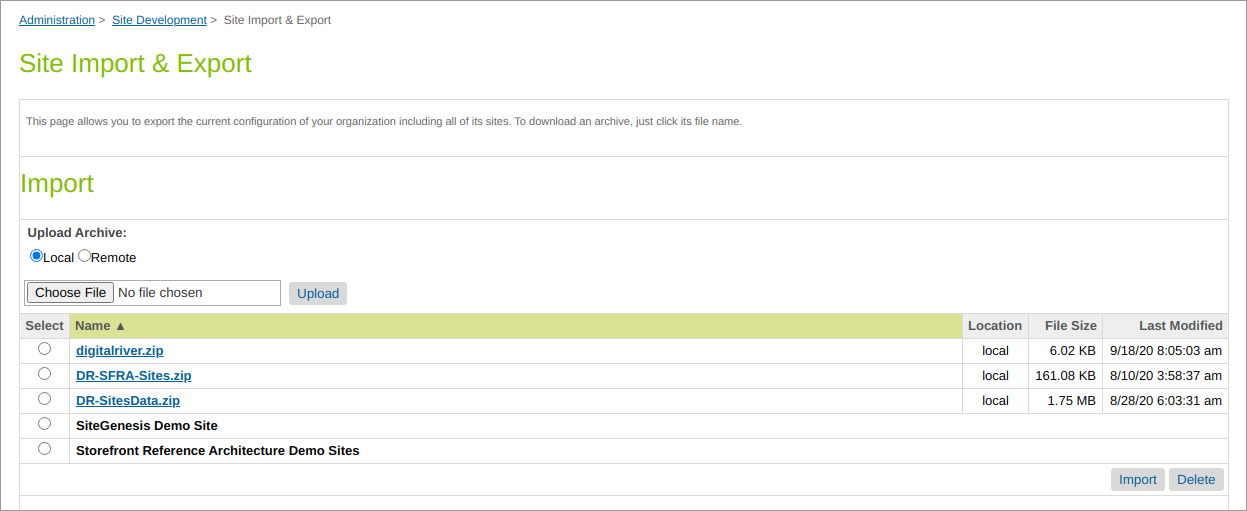
Select **Administration**, select **Site Development**, and then click **Site Import & Export**. Upload the **digitalriver.zip** file from the metadata folder.
Select **digitalriver.zip** and finish the import process.
{% hint style="info" %}
**Note**: We configured the **digitalriver.zip** metadata specifically for the RefArch site. If you have another site, unpack the zip file and rename the folder inside the Sites directory to exactly match your site ID. Then create a new zip archive from the `digitalriver`folder and use it to import the metadata.
{% endhint %}
### Jobs
The zip file creates the initial configuration for the jobs used to send SKU data to Digital River. Once the file is imported, you must select **Administration**, select **Operations**, select **Jobs**, and then click the **Job Steps Configuration** tab and change the site **Scope** to your site ID. See the [user guide](https://docs.digitalriver.com/salesforce-b2c-link-cartridge/salesforce-b2c-link-cartridge-3.0.1/user-guide) for more information on jobs.
Additionally, you should schedule the jobs to run regularly. See the [user guide](https://docs.digitalriver.com/salesforce-b2c-link-cartridge/salesforce-b2c-link-cartridge-3.0.1/user-guide) for detailed information about each of the jobs.